Skip to Main Content
Back to Navigation

5 Ways to Remove Paint from Wood Surfaces

Person wearing orange work gloves using a heat gun and paint scraper to remove old paint off a wooden door

Are you wondering how to get paint off wooden surfaces? Whether someone has painted over a nice piece of woodwork in your home or you’re looking to change the color of a piece of wood furniture, don’t worry! Removing paint from wood isn’t as difficult as you may think.

Depending on the type of wooden surface and the paint, you can easily restore the piece to its original glory (or upgrade it with a whole new look). Here are five ways to remove paint from most wooden surfaces.

1. Apply a Chemical Paint Stripper

Before you try any paint removal method, test it in a small, inconspicuous area of the piece. Monitor the test area for any signs of damage. You'll want to make sure that it doesn't damage the surface of the wood beneath and that the removal method will work on your particular project. Ensure you aren't working with lead paint, or you may need to contact professional painters for assistance.

One fast way to remove paint from wood is by using chemical paint strippers. You'll always want to use caution with chemical stripping to ensure adequate ventilation and protect your skin.

Step 1: Start your project in a well-ventilated area—outdoors, if possible. Gather all needed supplies and put on your protective gear: work gloves, safety goggles, and a respirator or mask. Prepare your work area with a drop cloth or plastic to protect the surrounding area from drips and spills.

Step 2: Follow the manufacturer’s instructions for the specific brand of paint striper you are using. Generally, you’ll use a paintbrush to apply a thick, even layer of paint stripper onto the painted wooden surface. Be sure to cover the entire area.

Step 3: Watch and wait for the paint stripper to soften the paint according to the manufacturer's recommended time on the label. Usually, this takes anywhere from 15 minutes to several hours.

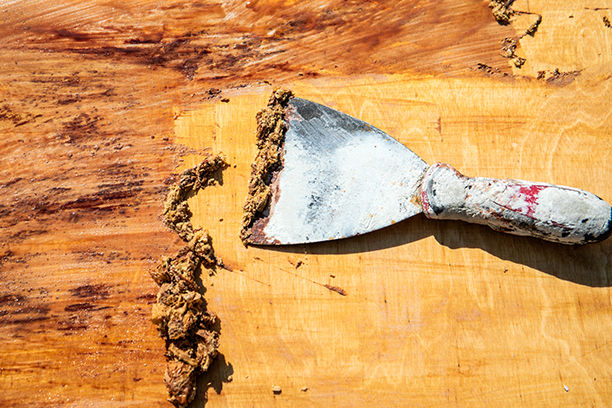
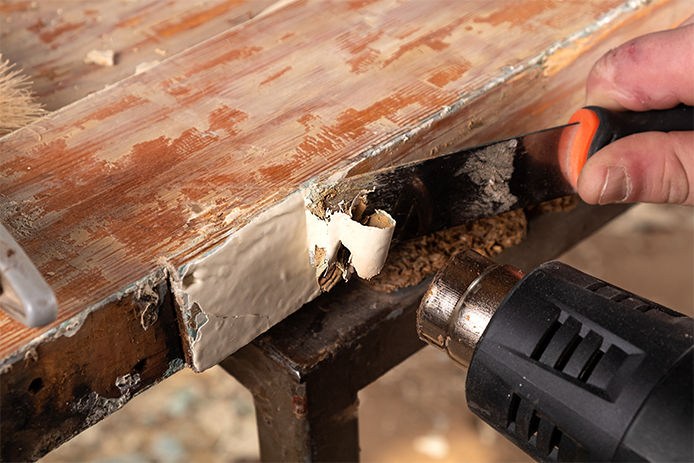
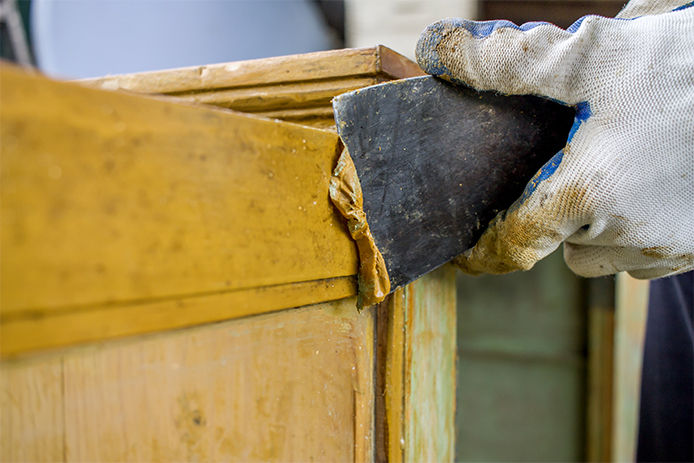
Step 4: Use a plastic or metal scraping tool, like a putty knife, to gently scrap away the softened old paint. Work in the direction of the wood grain, collecting the bits of stripped paint into a disposable container. 

Step 5: Repeat if necessary until you get the desired results. If there are several layers of paint or areas that are difficult to strip, you may need to apply the paint stripper again.

Step 6: Wipe down the wood surface with clean rags and mineral spirits or denatured alcohol to remove any residue. If the paint stripper you are using requires neutralization, follow the instructions on the product to neutralize the surface.

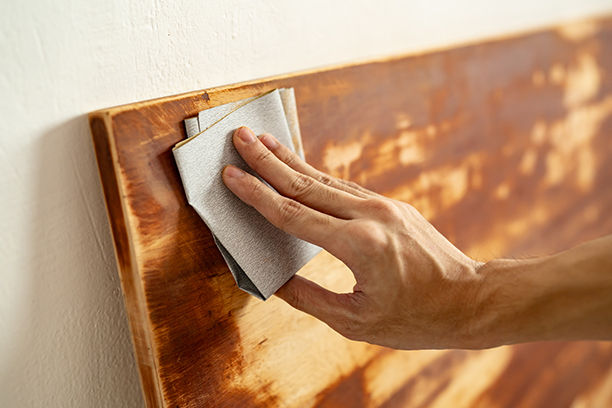
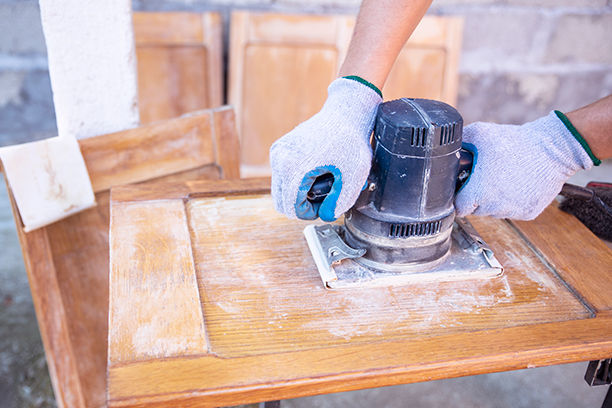
Step 7: Sand the wood surface to smooth the project and remove any remaining imperfections and residue. Work from a coarse sandpaper to a finer grit for a smooth finish. Your wood project should be ready to stain, wax, or add a fresh coat of paint now as you prefer. 

Step 8: Clean up the stripped paint and used rags properly. Always remember that the rags can present a fire hazard, so it's important to follow local regulations when disposing of them. Contact your local waste management office or visit their website to find the nearest hazardous waste disposal location.

2. Use Sandpaper or a Power Sander

You can remove paint from wood surfaces using sandpaper or a power sander. This method is especially effective if the layers of paint are thin. Some folks prefer this method of removing paint from wood surfaces because it’s chemical-free.

The drawback of using sandpaper is that it’s time consuming and labor intensive. The sandpaper method is best for small projects and surfaces. For larger projects, a power sander can help save you time and elbow grease. Follow the steps below to remove paint using sandpaper or a power sander.

Using Sandpaper:

Step 1: Gather your supplies before starting the project. You'll want to make sure you have a clear space to work. Sanding can create a great deal of dust, so it's best to wear protective eyewear and a dust mask to shield yourself from sawdust and wood particles. Put down a cloth or plastic to catch the dust and paint reside.

Step 2: Remove the paint with coarse-grit sandpaper (80-100 grit). Sand the surface, working in the same direction as the wood grain. Continue to sand until you've removed the majority of the paint from the wood surface. This process can take time, especially if there are multiple layers of paint. 

Step 3: Switch to medium-grit sandpaper (120-150 grit) to smooth the surface of your project and remove any remaining paint. Again, always work in the direction of the wood grain. Work until all remaining paint is removed.

Step 4: Finish the sanding process with fine-grit sandpaper (220 grit or higher) to achieve a smooth finish. Continue sanding toward the woodgrain until the project is completely smooth.

Step 5: Wipe down the wood surface with a clean, lightly damp cloth to remove dust and debris. Inspect the project for any remaining paint as you go. Once the surface is clean and free of the old finish, you can proceed to seal or stain the wood.

Using a Power Sander:

Using a power sander to remove paint from a wooden surface is an efficient option. Be sure to wear a dust mask and safety goggles to keep yourself protected against dust and debris. Spread out a drop cloth or plastic sheet.

Step 1: Start your project with coarse grit sandpaper (80-100) on your power sander. As with manual sanding, you'll progress to a finer grit as you work on the project. Using the power sander, move in the direction of the wood grain. Work evenly across the surface of the project until the majority of the paint is removed. 

Step 2: Switch to a medium grit sandpaper and then a fine grit paper as you progress. Work until the surface is completely free of paint. You may need to use sandpaper by hand to get some of the smaller nooks and crannies of your project.

Step 3: Clean the wood surface with a clean, damp cloth. Once the wood is paint-free, you can seal or stain the wood as you prefer. 

Remember that it's essential to follow all manufacturer’s instructions when you use a power sander. Avoid applying too much pressure as you sand, as it can damage the wood surface. Check the sandpaper regularly for wear and replace it as needed for best results. 

3. Use a Heat Gun

Another great way to remove paint from wood is a heat gun (also known as a hot air gun). This method is relatively fast and effective. A heat gun uses a stream of hot air to soften and loosen paint so you can easily scrape it away. Heat guns can also be used for household tasks like bending plastic and thawing frozen pipes.

Because a heat gun uses hot air, it's important to take safety precautions. Always wear work gloves and a respirator when using this method to remove paint. Follow the instructions below to use a heat gun for paint removal.

Step 1: Gather all supplies and work in an open area where you can move freely. Make sure the space is well-ventilated, as the heated paint can release fumes. Wear protective gear, including safety glasses, gloves, and a respirator. Spread out a drop cloth or plastic sheeting to catch chips and debris.

Step 2: Follow the heat gun manufacturer’s instructions to heat the gun to a medium or medium-low setting. It’s best to start cooler, as too much heat can scorch and damage the wood. Hold the gun a few inches from the painted surface, moving it back and forth evenly. Work in one small area at a time. 

Step 3: As the paint heats up, it will begin to bubble and blister—indicating the paint is becoming soft and can be scraped off the surface. While the paint is hot, use a scraper or putty knife to gently and carefully remove the softened paint from the wood, working in the direction of the wood grain.

Step 4: Continue heating and scraping small sections of the project until you’ve covered the entire surface. It may be necessary to go back and rework stubborn areas or use sandpaper to get the desired outcome. 

Step 5: When you've removed the paint from the wooden surface, wipe it down with a clean rag, checking for any missed spots. Use fine-grit sandpaper to finish the project, working in the direction of the wood grain.

Step 6: Clean up any scraped-off paint and debris, disposing of paint residue in accordance with local regulations. A heat gun isn't usually suitable for the removal of lead-based paint.

4. Use a Paint Scraper

For large, flat surfaces like fence posts, a paint scraper can be an effective option for removing paint. Many paint scrapers feature a sharp edge or blade that gets under the paint's surface, loosening it from the wood below.

The metal scraper method isn't suitable for wood items with delicate surfaces, as it can cause some scratching and damage. However, it's fast and effective on outdoor and exterior surfaces and projects with multiple thick coats of paint, especially if the paint is already chipping or peeling.

Step 1: Gather your supplies and put down a painter's cloth or sheeting to catch paint chips. You'll need to wear safety glasses to protect your eyes from paint chips and wood particles. You may also wish to wear gloves.

Step 2: Hold the paint scraper tool at a slight angle. Begin scraping at the paint in the direction of the wood grain. Apply light-to-moderate pressure to remove loose and peeling paint. 

Step 3: Work your way across the entire surface of the project, giving careful attention to the corners and edges where it can be harder to remove paint. Use a clean rag to wipe away loose paint chips as you go. 

Step 4: Once you've removed the paint from the project's surface, you may want to sand the project, especially the edges, to remove any remaining paint debris. Start with a course grit and progress to a finer grit to finish the surface.

Step 5: Clean up the area and dispose of the scraped-off paint chips properly. You can finish the clean surface of the wood with paint, stain, or another protective coating if you prefer.

5. Remove Paint with a Steam Stripper

A steam stripper is very similar to a heat gun in that it uses high temperatures to soften paint. However, steam strippers (also known as wallpaper steamers) tend to be a little gentler and won't cause scorching. It's important to test the steamer before using it on your wood project. Delicate wood can warp or get damaged by steam and water.

If you’d like to remove paint with a steam stripper, use the following steps. 

Step 1: Wear protective gloves and safety glasses to keep yourself safe as you work. Prepare your work area with a drop cloth or plastic sheet. Work in an open area where you have plenty of room to maneuver.

Step 2: Fill the steam stripper with water according to the manufacturer's instructions. Allow the steamer to heat up. Hold the steam plate against the painted surface for 15-30 seconds to let the steam penetrate and soften the paint.

Step 3: When the surface is hot and the paint is softened, use a scraper tool to gently scrape away the paint, working in the direction of the wood grain. Continue heating and scraping in small sections until you've covered the entire surface.

Step 4: Clean the surface by wiping it down with rags to remove any residual paint chips. Let the wood cool down and go over the surface, inspecting any areas that may need further attention.

Step 5: Sand the project, if necessary. Use fine-grit sandpaper and lightly sand over the surface and smooth it out. Work in the direction of the wood grain.

Step 6: Clean up the work area and dispose of any paint scrapings and debris. 

Get Beautiful Wood Projects with Do it Best

Woman sanding down a kitchen chair in her basement

Whether it’s a vintage piece of wooden furniture or a built-in cabinet covered with paint, you can give it new life by using the paint removal products and methods above. Even though removing paint from wood may seem daunting, it’s surprisingly easy with the right effective method.

There are five possible methods for removing paint from wooden surfaces: chemical strippers, sanding, heat guns, scraping, and steam strippers. Always test the method on an inconspicuous area to ensure it's appropriate for your project.

With the right tools and a bit of determination, you can transform any wooden project into a thing of beauty. Restore a natural finish and get rid of unsightly paint jobs with help from Do it Best. We have all the paint removal tools you need to make any project stand out!

test

How to Apply Deck Stain

Simple DIY tips for cleaning, prepping, and staining your deck

Learn more
test

5 Tips to Caulk Like a Pro

Learn how to get the perfect bead of caulk for a professional-looking finish!

Learn more
test

5 Things to Do Before a House Appraisal

If you're new to the home appraisal process, it can be a bit daunting. Today, we'll explore what a home appraisal is, how to prepare for a house appraisal, and give you five must-dos to help the appraiser see your home at its best!

Learn more
test

Gorilla Glue Buying Guide

Easily find the best adhesive to meet your next DIY project needs!

Learn more
test

Titebond Adhesives

Learn why this brand is trusted by the pros for woodworking and construction jobs

Learn more